First you will need the following things:
-
Soldering Iron, Solder, and Flux - 40w Soldering Iron - Radioshack, [URL=“http://www.radioshack.com/product/index.jsp?productId=2062715”]Solder - Radioshack, [URL=“http://www.radioshack.com/product/index.jsp?productId=2049774”]and Flux - Radioshack
-
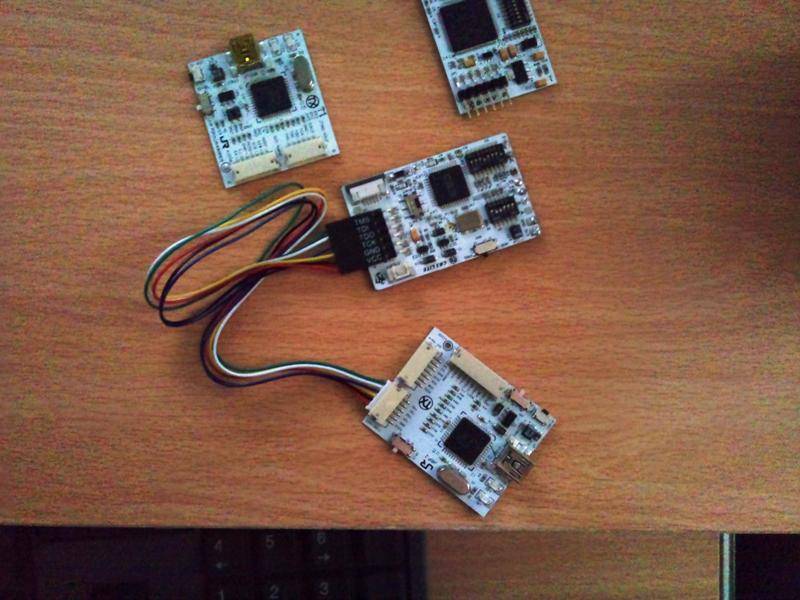
NAND-X - NAND-X - XCONSOLES or a JR-Programmer - JR-Programmer v2 - XCONSOLES
-
Team Xecuter CoolRunner Rev C - CoolRunner Rev C - XCONSOLES
NAND-X to CoolRunner cable if you bought the NAND-X (the JR-Programmer already comes with one) - NAND-X to CoolRunner Cable - XCONSOLES
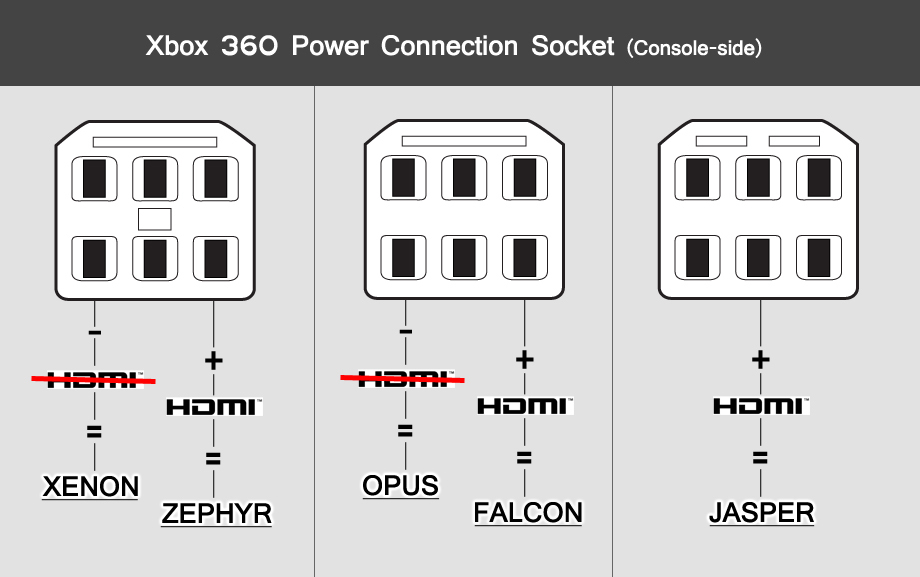
- For RGH1 (Good boot times) you will need any phat HDMI Xbox on dash 14717 or below, and for RGH2 (bad boot times) you will need any phat HDMI Xbox on dash 14719 or higher
How to identify what type of phat Xbox you have:
CoolRunner install diagrams:
RGH1:

RGH2:

How to install the NAND-X & JR-Programmer Drivers:
Download the drivers here: NAND-X & JR-Progammer Drivers
How to install the drivers (JR-Programmer drivers install the same way just chose the JR-Programmer ones instead):
Youtube video:
How to read the nand:
- Install the NAND-X or JR-Programmer wires like so:
[details=Open Me]

[/details]
2. Download J-Runner: J-Runner
-
Once downloaded plug in your NAND-X or JR-Programmer to both the PC and the Xbox
-
Plug in the power cable to the Xbox but DONT turn on the console
-
Then when your NAND-X or JR-Programmer is detected in J-Runner go ahead and click Read NAND and select your console
Flashing the CoolRunner:
-
Make sure the Xboxs power cord is NOT plugged into the console
-
Switch the switch on the CoolRunner to PRG or program
-
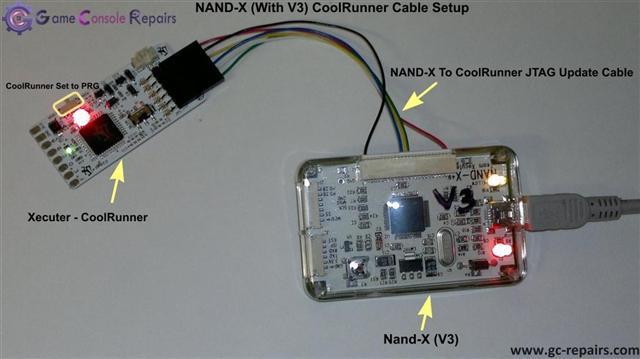
Next Plug in the NAND-X to CoolRunner cable into both the NAND-X and the CoolRunner like so:
Open Me
or if your using a JR-Programmer plug the JR to CoolRunner cable in like so:
-
Plug your NAND-X or JR-Programmer into your PC
-
In J-Runner select your hack version in the top right (RGH, RGH2) and make sure the bubble is set to glitch then click flash CoolRunner and select your console.
Note: For RGH2 select either A-D or the experimental Falcon
- Once it flashes unplug the CoolRunner and set the switch to NOR
How to create and write the ECC:
-
Plug your NAND-X wires from your Xbox back into the NAND-X or JR-Programmer
-
Have you Xboxs power supply plugged into the console but dont turn on the Xbox
-
In the top right of J-Runner make sure Glitch is selected
-
If your doing an RGH1 install click create ECC and select your console then click write ECC. If your doing an RGH2 install just click write ECC and select your console.
-
Once done unplug your NAND-X wires
How to Boot into Xell and get your CPU key:
-
With everything plugged into the console press the eject button and you should boot into xell
-
After that wait until Xell finishes loading and find where it says “Your CPU Key”
here is a picture of xell:
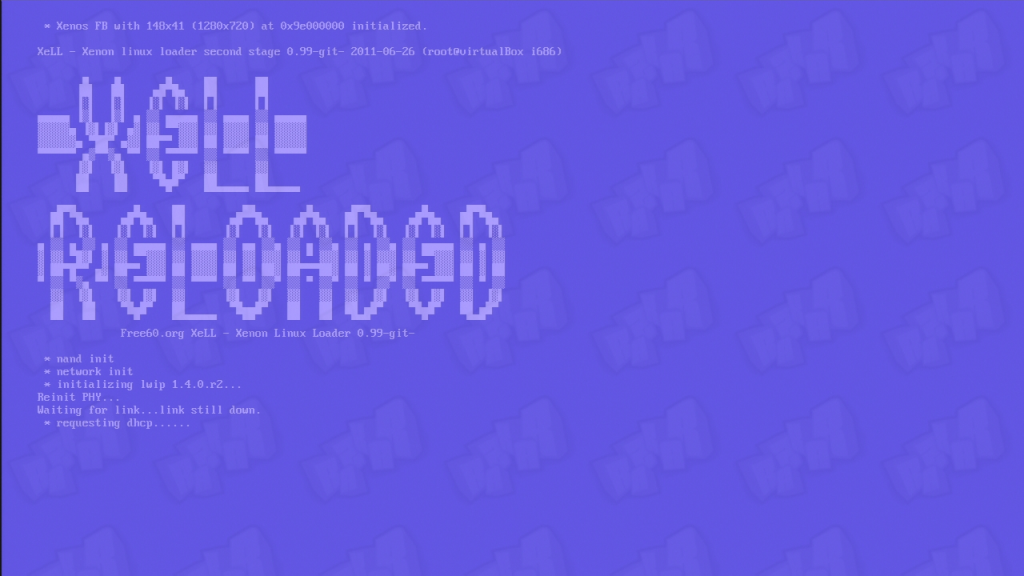
- Now take a picture or write down the CPU key
How to Create and Write a glitched image:
-
With the console turned off and the power cable plugged in go ahead and plug in the NAND-X wires into your NAND-X or JR-Programmer
-
Now load your previously dumped NAND into the Source File area in J-Runner
-
After that is done type in your CPU key in the field labeled CPU key in J-Runner
-
Make sure that glitch is selected in the top right of J-Runner
-
Then go to the top right of J-Runner and select your Dash version & your hack version (either RGH1 or RGH2)
-
Then click create image at the top of J-Runner
-
Once done click Write NAND and wait for it to finish
-
Once finished go ahead and unplug all the cables to the NAND-X and the JR-Programmer and power on the console
-
Congratulations if you booted up you now have a working RGHed Xbox 360.
-
Go ahead and de-solder the NAND-X wires from the NAND points on the Xbox 360
Video Tutorials if you dont understand the text tutorial:
RGH1:
Part 1:
Part 2:
RGH2:
Part 1:
since there are so many parts to the video go ahead and click on the next part in youtube video listed above
Credits:
Credit goes to Team Xecuter, and all the people who created & uploaded those pictures and videos
Credit also goes to me for writing the tutorial