This Tutorial explains how to hack your Xbox360 Gaming Console with
the Reset Glitch Hack.
Required Software and Hardware
Prerequisites
· Installed Xilinx Lab Tools
Software
· Python and Pyton Crypto
· Impact (from Xilinx Lab Tools)
· NandPro (>= v2.0e)
Hardware
· USB SPI Programmer to dump/flash the Xbox360’s NAND
· XC2C64A CoolRunner-II CPLD (aka Digilent C-mod)
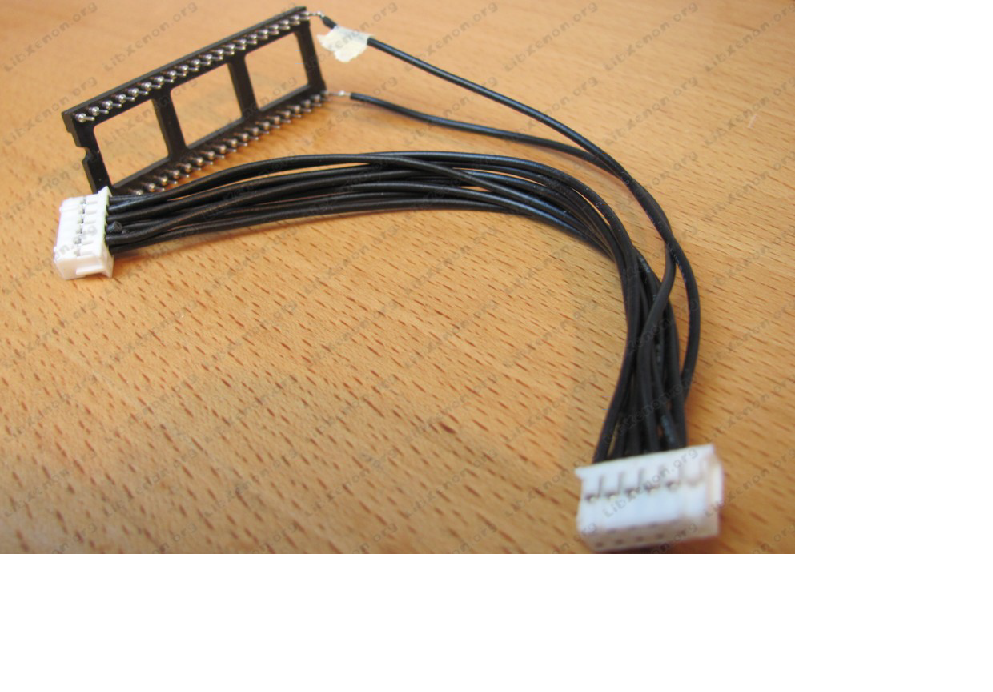
· Socket for the CPLD
· Xilinx JTAG Programmer cable
· 1x 220pF capacitor
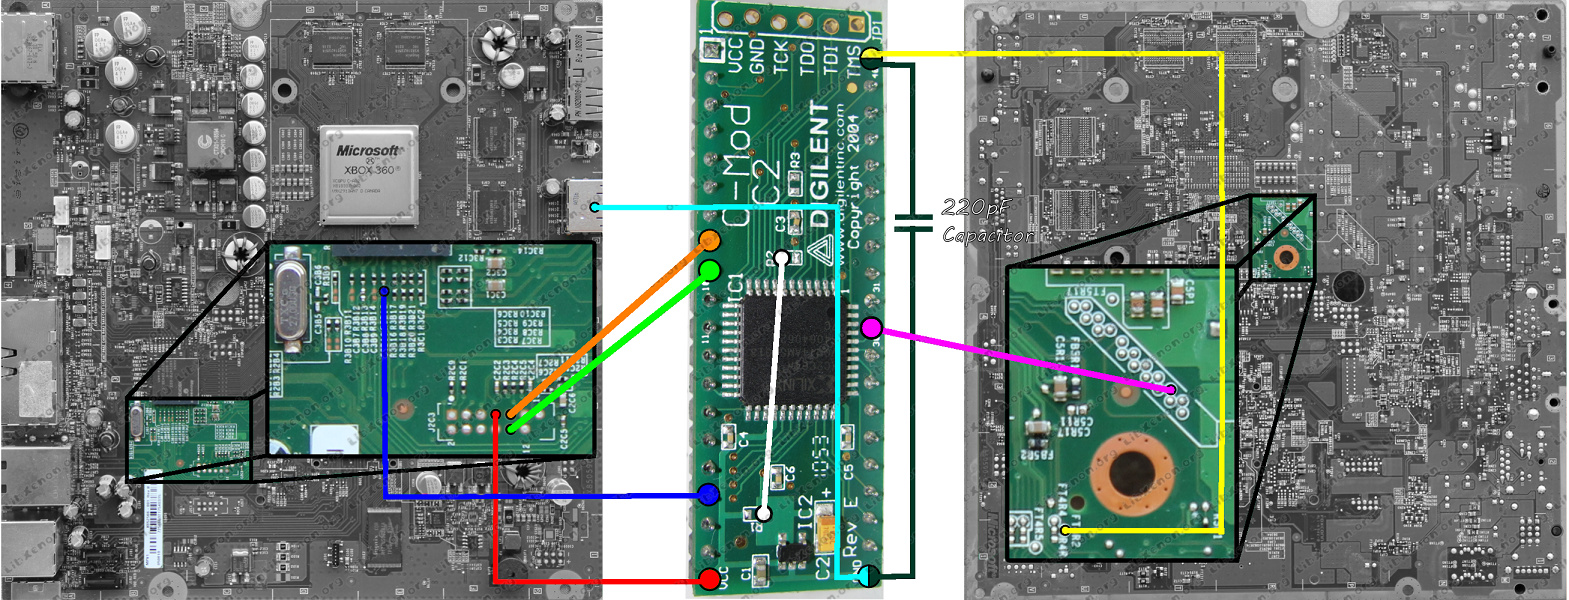
1. Dumping NAND
Use the following diagram to solder your USB SPI Programmer

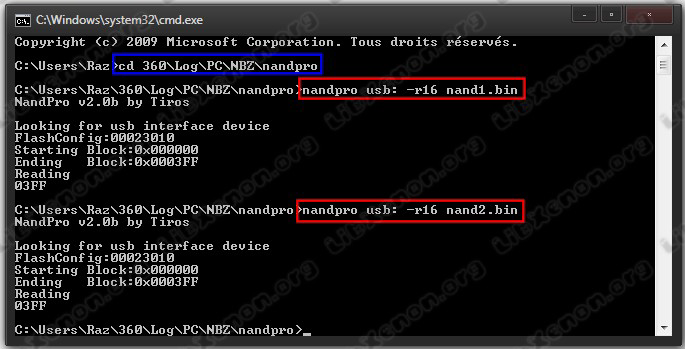
· Open windows’ command prompt and launch NandPro.
· Dump your NAND twice by using the read command for 16MB
NAND :
nandpro usb : -r16 nanddumpname.bin
Compare the two dumps with the following command (you can
use MD5 Checksums too) :
fc /b nanddumpname.bin nanddumpname2.bin
You should see something like FC : No difference found. If the
two dumps don’t match, do a new dump and check again.
2. Installation of Python and Python Crypto
· Install Python 2.7 (32bit!) with the default settings :


· Install PyCrypto 2.3 with the default settings :
To enable python in windows’ command prompt, we will have to modify
the environment variables .
· Go in Control Panel > System > Advanced system settings
· Click on environnement variables

· Click on New in system variable
· Add this for the name and the value of the variable :
PYTHONPATH
%PYTHONPATH%;C:\Python2.7 ;
7
3. Creating the Hackimage
· Download the gggggg-hack (Free60-Git Repository).
· Put your original NAND dump in the root of the gggggg-folder
and create an folder named “ouput” (in the root aswell).

· Open windows’ command prompt again and navigate to the
gggggg-folder, then type this python command (don’t forget to
modify it with your NAND dump name) :
python common/imgbuild/build.py nanddumpname.bin
common/cdxell/CD common/xell/xell-gggggg.bin

You should see the following

The file image_00000000.ecc is located in the output folder now.

[b]· Copy this file into your nandpro folder and navigate to the
folder via commandprompt again
· Use the following command to flash the image to your console’s
NAND.
nandpro usb : +w16 image_00000000.ecc
/!\ Pay attention that you have to use the +w16 switch and not
the -w16 one /![/b]
The flashed file has a size of 50 blocks so you should see 004F when
the flashing is done.
4. Programming the CPLD
Power your CPLD with 3.3V on pin 20 and GND on pin 21. There are
many solution to do this … here are some of them :
· Use an old DVD drive supply cable by cutting 5 and 6 cable (3.3V
and GND) and connect it to the a CK or the motherboard drive
socket
OR
· Solder the pin 20 to the J2C1.8 point of the motherboard and pin
21 (GND) to a point of the motherboard like the legs of the
various connector-metalcasing.

· Grab your LPT/USB XilinX JTAG programmer cable. Connect the
cable to the PC and the CPLD.(If you don’t have one, you can use
GliGli’s schematic to build a LPT JTAG Programmer)


· Launch “iMPACT” (from XilinX Lab Tools) and let’s start the
programming … just follow the images.(You have to setup the
compatibility mode only if your Programmer does not get
detected right away)


5.Wiring
· On the CPLD, remove the Resistor R2 and connect R2’s upper
pad to R1’s lower pad.

· Place the CPLD on the motherboard like you see on the picture.
We recommend to use double coated tape + material to isolate
the CPLD.

· Use the diagrams which are distributed together with this
tutorial to solder the needed connections. It’s recommended to
use a socket!
6. Enjoy
· You can now start your console normally and see XeLL boot
within 2 minutes. You can now enjoy unsigned code on your slim.
7. Links
· Free60 git Repository
· NANDPro v2.0e
· Python 2.7.2 32bit
· PyCrypto 2.3
· Xilinx Lab Tools
copy and paste from here http://www.xbox360iso.com/reset-glitch-hack-t451229.html