The Ultimate Halo Reach Thread!

This thread is split into 3 sections: Singleplayer, Multiplayer and Other.
WARNING
This thread contains a large amount of spoilers that may ruin the games ending or story for you. Do not continue if you don’t want to know what happens.
Achievements
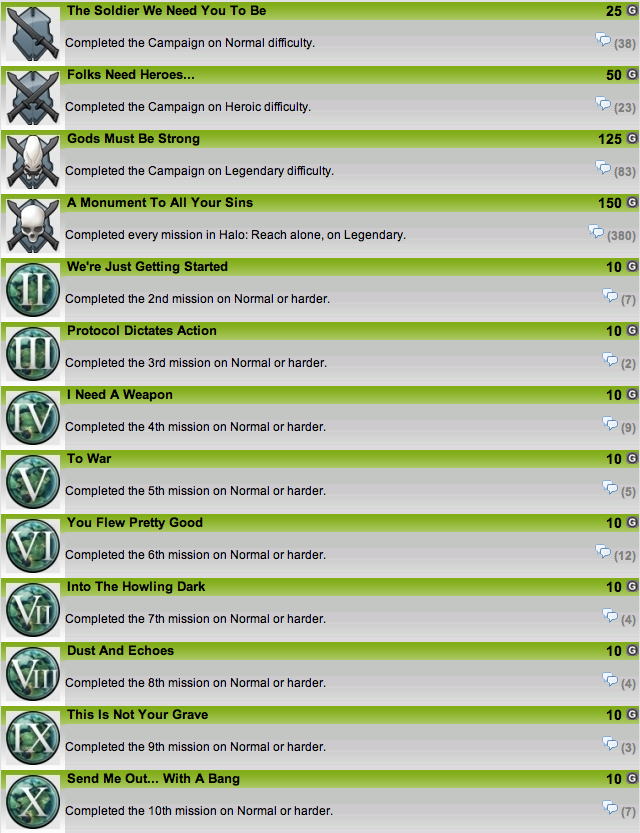


Singleplayer
Overview
Overview
Halo: Reach is a first-person shooter video game set in the Halo universe and direct prequel to Halo: Combat Evolved, depicting the Fall of Reach. It was developed by Bungie, LLC. and published by Microsoft Game Studios solely for the Xbox 360. It was announced by Joe Staten during Microsoft’s Media Briefing at E3 2009; Reach was released on September 14, 2010 in North America, Europe, Australia, and Asia with the exclusion of Japan whose release was a day later.
Campaign Chapters
[details=Campaign Chapters]
Noble Actual
Noble Actual is the first level in the Halo: Reach campaign, consisting entirely of a cinematic cutscene involving SPARTAN-B312’s introduction to Noble Team and the briefing for the game’s first mission by Colonel Urban Holland.
Winter Contingency
In the level, Noble Team is sent to Visegrád, a remote agricultural region of the planet Reach, to investigate a disturbance in the communications relay responsible for the planet’s communications to the rest of the UNSC, and the disappearance of the Army troopers sent in to investigate before them. Sabotage by insurrectionists is suspected, but the cause of the disruption.
ONI: Sword Base
Noble Team is deployed to Sword Base after a Covenant corvette begins attacking the facility. Due to the sensitive nature of the facility, orbital rounds are prohibited, forcing Noble Team to go groundside to defend the facility.
Two Falcons drop Noble Team around Sword Base. After Kat and Noble Six clear the courtyard outside the facility, they are ordered by Sword Control to proceed to the main gate. However, they are stopped by a pair of Wraiths, which Noble Six eliminates with a Target Locator.
A Pelican then drops off a Warthog, which Kat and Noble Six ride to reactivate a COM array to contact Command and an anti-air gun to help clear the skies. After completing their task, they meet up with the rest of the team at Sword Base.
They fight their way up through the atrium to the top floor. There, Noble Six helps Emile destroy several Phantoms and Banshees over the airbase making it possible for a pair of Longswords to move towards the corvette, lock onto it, and have it destroyed by a MAC round from orbital defenses.
Noble Team is called back into Sword Base by Dr. Halsey, who reprimands Carter for not pursuing the Sangheili at the Visegrád Relay. She explains that the Sangheili were most likely part of an artifact retrieval strike team, and that the notes stored at the Visegrád Relay held very important information. Kat then hands over the data module she retrieved from the station. Carter and Halsey exchange barbs, and Noble Team leaves as Dr. Halsey examines the data module.
Nightfall
The mission involves Noble Six cooperating with Jun-A266 (Noble Three), in a series of stealth-based encounters at night, the purpose of which is to recon Covenant Forces in the colloquialy named ‘Dark Zone’. They first eliminate a few guards posts, and then encountering a native creature of Reach, the Gúta. They then meet a few militia troopers attempting to recover smuggled UNSC weaponry at a waterfront. The militia troopers gave the Spartans information about a hydro plant further into the dark zone. There they discovered a Covenant pylon, which was generating the dark zone. Jun placed a det-charged inside of it to avoid detection by the Covenant. After proceeding further into the dark zone and eliminating the Covenant troops in the area, the two Spartans discovered a Covenant landing zone. Kat receives the visual and tells them to retreat so they can prepare for the next day.
Tip of the Spear
After Jun and Noble Six’s discovery of a hidden Covenant army, the UNSC decide to execute a large counter-attack against the Covenant. Throughout the battle, Catherine-B320, Noble Team’s second-in-command, and Noble Six are able to destroy two Covenant anti-aircraft gun which makes it possible for two UNSC Frigates and several Longswords to bombard Covenant ground forces (which leads to the destruction of at least three Scarabs).
After killing a Zealot and destroying another anti-aircraft gun, Noble Six joins Jorge-052 to destroy a large tower, designated “Spire One”, acting as both a cloaking device and teleporter around a Covenant base. After their Falcon makes its way through the Spire’s energy field, the craft is disabled by an EMP pulse, which sends it crashing to the ground, killing the crew. The Spartans, Noble Six and Jorge-052, have to complete the rest of the mission on foot or in a flatbed truck (or via hijacked Banshee). After deactivating Spire One’s energy shield, Six leaves the area on a Falcon accompanied by Carter-A259 and Jorge-052 as the UNSC Grafton destroys the Spire with its MAC gun. Immediately after the tower collapses, the Grafton is shot and destroyed by the Covenant Supercarrier Long Night of Solace.
Long Night of Solace
The Covenant invasion of Reach is in full force, and Catherine-B320 has come up with a plan to take the fight to the enemy. Noble Team, minus Emile-A239 and Jun-A266, are dropped off to a beach by a Falcon, and they must fight their way to the Sabre Program Launch/Research Range, which is under attack by Covenant ground and air forces.
Once they fight their way inside, SPARTAN-B312 and Jorge-052 enter a Sabre that is immediately launched into the planet’s orbit, along with at least four other Sabres.
In space, they join the other UNSC forces in defending the station Anchor 9 and assist the UNSC Savannah in hijacking a Covenant Corvette, the Ardent Prayer. Jorge is dropped off at the station Anchor 9, as Noble Six and the remaining Sabres take out the corvette’s engines just as it positions itself for a refueling track with the Covenant supercarrier Long Night of Solace. After boarding the corvette, Noble Six and his forces defeat the crew and lock the ship. Jorge arrives in a Pelican carrying a Slipspace drive, which was taken from the UNSC Savannah. It is planned that the slipspace drive would be used as an improvised bomb, to be activated inside the corvette’s hangar when its close proximity of the supercarrier, in order to jump a section of the supercarrier, destroying it. However, Covenant infantry forces soon arrive to destroy the “bomb”. Though the Covenant forces are successfully neutralized, retreat to the Sabres is cut off by the battle damage from the Savannah. The Pelican used as a vector for the “bomb” is damaged and unable to fly, leaving a space-jump as the only way off the Corvette. The slipspace drive’s timer is also damaged, forcing Jorge to stay behind and activate it manually. Noble Six is spared when he gets shoved out of the corvette by Jorge, just before the Slipspace drive is activated. The Drive, when activated, creates a Slipspace rupture that transports Jorge, the corvette, and the central section of the supercarrier to an unknown location. For a very brief period of time, it is believed that the Covenant naval attack force at Reach was entirely neutralized by Jorge’s sacrifice, but the massive Covenant Fleet of Particular Justice arrives in-system just moments later.
Exodus
Noble Six stands before the crashed Long Night of Solace, having fallen from orbit. After wandering through the wilderness, Six arrives at New Alexandria, where the Covenant, supported by four Covenant corvettes, are fighting against the outnumbered and outgunned UNSC forces. Staff Sergeant Pete Stacker orders missiles to be fired at the Corvette, but to no avail. Noble Six must find a way to stop the attack before the entire city is glassed.
Noble Six then finds a way through the city and links up with Army forces to assist in the evacuation of Traxus Tower while fighting Brutes. However, they arrive too late, as one of the corvettes has already moved into position above the tower.
Noble Six acquires a jetpack and joins a group of ODST specialists known as the Bullfrogs, enacting an emergency plan to capture an executive landing pad. Six then proceeds to Traxus Tower, where he/she and the ODSTs take the landing pad, allowing a group of civilians to evacuate in a Pelican.
Leaving behind the ODSTs and a few UNSC troops to bring more civilians to the landing pad, Noble Six mans a Falcon’s turret to provide air cover for evacuation craft leaving the city. They take an alternate route to avoid Covenant forces clustered in the middle of the city.
After an evacuation transport is shot down by a corvette, Noble Six assists Army forces in clearing the way to missile batteries further in the city. The missile batteries disable the corvette’s weaponry, allowing the remaining transports to slip past and escape the city.
Kat contacts Noble Six and instructs the Lieutenant to rejoin the rest of Noble Team. During the exchange, Noble Six alerts the team to Jorge’s sacrifice during Operation: UPPER CUT.
New Alexandria
Noble Six meets up with the rest of Noble Team and is informed that the Covenant are jamming all communications to Command. The SPARTAN mounts a Falcon and assists Kat in destroying the jammers.
NOTE: All encounters in this level are randomized. The three jammers are the only consistent parts, and the order in which they need to be destroyed may change between playthroughs.
One jammer is located at the New Alexandria Hospital. The troopers sent to destroy it are locked in a fight with the Brutes before Noble Six arrives and destroys the jammer.
Another jammer is located at Club Errera in the Vyrant Telecom Tower. Two pairs of Mgalekgolo stop the troopers, and Noble Six must deal with them before destroying the jammer.
A jammer is also located in a penthouse at the Sinoviet Center. Troopers assigned to destroy it were killed by Drones (save for a single survivor) and Noble Six must finish the job.
As Noble Six destroys the jammers, Covenant Battlecruisers arrive to the city and start glassing the areas further away.
Between destroying the generators, Noble Six must also complete secondary objectives which revolve around assisting the UNSC forces in the city. In single player and 2-player co-op there is one task between each jammer, while 3 and 4 player co-op have two objectives simultaneously assigned to the players. These objectives include
Gunnery Sergeant Edward Buck requests assistance on a classified mission. Noble Six is instructed by Kat to escort Buck’s Falcon. Buck’s exact task varies; he may be rescuing his men from various danger or just transitioning inside/out of the city.
A team of Troopers is under a Covenant attack and requests assistance. Kat instructs Noble Six to kill the Covenant in question. The targets may be Hunters, Jackal Snipers or Brutes.
Elites and Engineers are breaching into a building from the rooftop. Kat requests Noble Six to take them out before they succeed.
A Pelican evacuating civilians cannot take off due to Covenant Shade turrets on the nearby rooftops. Noble Six has to destroy the Shades.
Another team of 4 Troopers is under attack by Banshees. Noble Six is sent to take out the banshees so a pelican can pull out the Troopers.
An additional jammer is found in an exposed rooftop location. Noble Six must eliminate Covenant forces guarding it and take it out.
Gunnery Sergeant Pete Stacker calls in under callsign Oscar 1-8 requesting assistance in taking down three jackal snipers hammering their position.
After the last jammer is destroyed, Kat receives orders from Colonel Urban Holland that all personnel are to be evacuated through the Office of Naval Intelligence Headquarters building. However, a group of Shade turrets stationed around the building are preventing any evacuation craft from escaping.
After Noble Six destroys all of the turrets, The SPARTAN meets up with the rest of Noble Team at the ONI HQ. However, they receive an urgent hail from Colonel Holland, informing them that they are being redeployed to Sword Base. Just then, the Covenant begin glassing the city, and the signal is cut off. As Noble Team flees to a radiation bunker, Kat is hit in the back of the head by a Needle Rifle round fired from a Phantom overhead. Her body is dragged into the bunker by Noble Six as the doors close.
Three days later on August 26, after the Covenant forces are gone, Noble Team walks outside to be picked up by a Pelican, with Kat’s dead body in Carter’s arms.
The Package
Noble Team is ordered to destroy Sword Base in a torch-and-burn op. Noble Six and a small strike force of Orbital Drop Shock Troopers infiltrates Sword Base to take out Covenant anti-air turrets so reinforcements can land. On their way to the facility, the team finds an operational Scorpion Tank that they use to fight through Covenant forces around Sword Base. Meanwhile, the Pelicans carrying the rest of Noble Team land at Sword Base and begin the assault.
Noble Six arrives at Sword Base, and the entire team pushes through to a set of pre-arranged coordinates. However, there is nothing there. Auntie Dot receives a set of revised coordinates from an AI of unknown origin, and a hidden door slides back to reveal an excavation tunnel. Noble Team rides a cart down the tunnel, where they find a large Forerunner cavern.
On the way down, Dr. Halsey reveals herself as the one who orchestrated their arrival. She asks for their assistance in defending her lab while she decrypts final information from the Forerunner ruins.
Noble Team uses Wolf Spider turrets to defend the lab as the Covenant begin their attack. They engage in a open firefight against incoming waves of Covenant and after a period of time, Dr. Halsey opens the doors to the lab.
Noble Team walks into the lab, revealing a large, glowing Forerunner artifact in the center. Dr. Halsey tells them about a great discovery that could change the tide of the war, and stresses that it is imperative that they get the information off-planet. She then shows them Cortana, who is revealed to be the AI that sent them the revised coordinates. She stores Cortana in a data storage unit and gives it to Noble Six, whom Cortana has chosen. Jun leaves to escort Halsey to CASTLE Base, while the rest of Noble Team gets into a Pelican to fly to the UNSC Pillar of Autumn that is awaiting their arrival. As they depart, a large underground explosion destroys Sword Base, denying the Covenant access to whatever remains of their research.
The Pillar of Autumn
The Pelican carrying the remaining members of Noble Team is critically damaged and Carter-A259 is badly wounded. Carter orders SPARTAN-B312 and Emile-A239 to complete the courier mission without him, while he lures the Covenant away from the pair by using the Pelican as a decoy. Emile-A239 and SPARTAN-B312 execute a low-altitude jump from the Pelican outside of the dockyard and are forced to fight their way to the facility. After battling through several Covenant outposts, the two SPARTAN-IIIs are forced to continue their journey through a cave system to circumvent a large group of Covenant forces. Upon reaching the other side, however, they are confronted by a Scarab. Realizing that the Scarab’s presence prevents Emile and Noble Six from moving on, Carter rams it with the Pelican, knocking it off a cliff and sacrificing himself in the process. The two SPARTAN-IIIs continue their journey and eventually reach the Aszod shipbreaking facility.
The two SPARTAN-IIIs are then hailed by Captain Jacob Keyes, whose cruiser, the Pillar of Autumn, is moored at the facility, and are ordered to clear a landing zone for the Captain, who will use a Pelican to retrieve the Package himself. Emile mans the facility’s Mass Driver to provide covering fire against incoming Covenant Phantoms and Banshees, while Noble Six and surviving troopers engage the Covenant on the ground. Once cleared, Keyes’ Pelican arrives and Captain Keyes retrieves the Package from Noble Six. As the package is handed over, a CCS-class Battlecruiser is revealed to be moving in on the Pillar of Autumn. Keyes orders Emile to fire on the advancing Battlecruiser, however, before Emile can oblige a Phantom attacks the landing zone, destroying one Pelican and deploying a group of Sangheili warriors onto the Mass Driver. Emile successfully kills one of the Sangheili with his shotgun before a second sneaks up behind him and impales him with an energy sword. Still alive, Emile draws out his kukri and stabs the Sangheili in the neck.
Keyes returns to the landing platform and offers Noble Six transportation to safety. The SPARTAN-III refuses in order to defend the Captain as he heads towards his ship. Using the Mass Driver, Six defends the site and stalls the Covenant Cruiser just as it is about to glass the area. After successfully halting the cruiser’s attack, Noble Six looks on as the Pillar of Autumn takes off and heads towards space to escape Reach, with the package safely secured.
Lone Wolf
Lone Wolf is the eleventh and final campaign level of Halo: Reach. The level takes place after the credits and will be accessible to players when they finished the entire game. The setting of the level begins at 20:00 hours of August 30, 2552, near the ship-breaking yards at Aszod. SPARTAN-B312, left at the ship-breaking yards after the UNSC Pillar of Autumn’s escape, is left to simply survive as long as possible. After fighting off waves of Covenant forces, Noble Six eventually succumbs and is killed by a group of Sangheili warriors. Contrary to popular belief it is possible to technically “survive” this mission. If you have 4-player co-op you can play long enough to where the game automatically starts the cutscene even though you didn’t die.[/details]
Characters
[details=Characters]Auntie Dot (First appearance)
Avery Junior Johnson (Firefight voice only)
Beta Red Actual (First appearance)
Buckman
Carter-A259 (First appearance)
Catherine-B320 (First appearance)
Catherine Elizabeth Halsey
Cortana
Duvall (First appearance)
Echo Team (First appearance) (Mentioned Only)
Edward Buck
Emile-A239 (First appearance)
Gauntlet Team (First appearance) (Mentioned Only)
Jacob Keyes
Jake Chapman
John-117 (Easter egg/Firefight voice only)
Jorge-052 (First appearance)
Jun-A266 (First appearance)
Pete Stacker
SPARTAN-B312 (First appearance)
Team Beta (Mentioned Only)
Travis (First appearance)
Urban Holland (First appearance)
Red team (Mentioned Only)[/details]
Vehicles
[details=Vehicles]Cart
CAS-class assault carrier
CCS-class battlecruiser
Charon-class light frigate
UNSC Aegis Fate (Mentioned only)
CSO-class supercarrier
Long Night of Solace
D77-TC Pelican dropship
GA-TL1 Longsword-class Interceptor
Halcyon-class cruiser
UNSC Pillar of Autumn
HuCiv HC1500
Tractor Unit
M12 Force Application Vehicle
M12 Light Reconnaissance Vehicle
M12G1 Light Anti-Armor Vehicle
M12R Light Anti-Aircraft Vehicle (First appearance)
M274 Ultra-Light All-Terrain Vehicle
M808B Main Battle Tank
M831 Troop Transport
Orbital Insertion Pod
Paris-class heavy frigate
UNSC Grafton (First appearance)
UNSC Savannah (First appearance)
UNSC Saratoga (First appearance)
S-2 Traxus Cargo Transporter
SDV-class heavy corvette
Ardent Prayer
“Spade” flatbed truck (First appearance)
Stalwart-class light frigate
UNSC Commonwealth
UNSC Stalwart Dawn (First appearance)
Type-25 Troop Carrier
Type-26 Assault Gun Carriage
Type-26 Ground Support Aircraft
Type-27 XMF (First appearance)
Type-31 XMF
Type-32 Rapid Assault Vehicle
Type-47 Ultra Heavy Assault Platform
Type-48 Light Assault Gun Carriage (First appearance)
Type-52 troop carrier
UH-144 Falcon (First appearance)
YSS-1000 Sabre (First appearance)[/details]
Weapons
[details=Weapons]Combat Knife
H-165 FOM (First appearance)
Landmine (First appearance)
Medusa Missile (First appearance)
M1024 ASW/AC 30mm ALA Cannon (First appearance)
M247H Heavy Machine Gun (First appearance)
M319 Individual Grenade Launcher (First appearance)
M392 Designated Marksman Rifle (First appearance)
M41 Light Anti-Aircraft Gun
M41 Surface-to-Surface Rocket Medium Anti-Vehicle/Assault Weapon
M45 Tactical Shotgun (First appearance)
M68 Asynchronous Linear-Induction Motor
M6G Personal Defense Weapon System
M79 Multiple Launch Rocket System(First appearance)
M8 Automated Defense System (First appearance)
M9 High-Explosive Dual-Purpose Grenade
MA37 Individual Combat Weapon System (First appearance)
Magnetic Accelerator Cannon
MG460 Automatic Grenade Launcher (First appearance)
Sniper Rifle System 99 Anti-Matériel (First appearance)
Type-1 Antipersonnel grenade
Type-1 Energy Weapon/Sword
Type-2 Energy Weapon/Hammer
Type-25 Carbine
Type-25 Directed Energy Pistol
Type-25 Directed Energy Rifle
Type-26 Anti-Infantry Stationary Gun
Type-31 Rifle (First appearance)
Type-33 Guided Munitions Launcher
Type-33 Light Anti-Armor Weapon
Type-38 Anti-Aircraft Cannon (First appearance)
Type-50 Directed Energy Rifle/Heavy (First appearance)
Type-51 Directed Energy Rifle/Improved (First appearance)
Type-52 Directed Energy Support Weapon
Type-52 Guided Munitions Launcher/Explosive (First appearance)
Type-52 Special Applications Rifle(First appearance)
M71 “Scythe” Anti-Aircraft Turret(First appearance)
Weapon/Anti-Vehicle Model 6 Grindell/Galileian Nonlinear Rifle
15cm Mark/2488 1.1GJ MAC(First appearance)[/details]
Equipment
[details=Equipment]Active camouflage
Antigravity Pack
Armor Lock
Drop Shield[25] (First appearance)
Hologram (First appearance)
MJOLNIR Powered Assault Armor/Mark IV
Mark IV(G) MJOLNIR Powered Assault Armor (First appearance)
MJOLNIR Powered Assault Armor/Mark V
Mark V(B) MJOLNIR Powered Assault Armor (First appearance)
UA Multi-Threat variant (First appearance)
Commando variant (First appearance)
CQC variant (First appearance)
ODST variant
CQB variant
EOD variant
O variant (First appearance)
AA variant (First appearance)
FJ/PARA variant (First appearance)
HAZOP variant (First appearance)
MP variant (First appearance)
R variant
MJOLNIR Powered Assault Armor/Mark VI
ODST Ballistic Battle Armor
Sangheili Combat Harness
Special Operations Harness (First appearance)
General Harness (First appearance)
Field Marshall Harness (First appearance)
Sprinting (First appearance)
Jetpack (First appearance)
Unnamed Shielding Attachment (First appearance)
Portable bridge (First appearance)[/details]
Species
[details=Species]Gúta (First appearance)
Human
Huragok
Jiralhanae
Kig-yar
Skirmisher (First appearance)
Mgalekgolo
Moa (First appearance)
Sangheili
Unggoy
Yanme’e[/details]
Multiplayer
Maps
Maps
Default
Boardwalk
Boneyard
Countdown
Forge World
Powerhouse
Reflection
Spire
Sword Base
Zealot
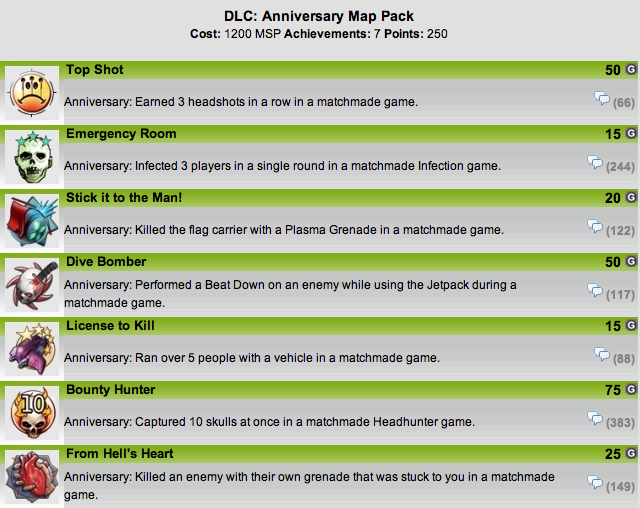
Anniversary Map Pack
Battle Canyon (Battle/Beaver Creek remake)
High Noon (Hang 'em High remake)
Penance (Damnation remake)
Ridgeline (Timberland remake)
Solitary (Prisoner remake)
Breakneck (Headlong remake)
Installation 04 (Firefight)
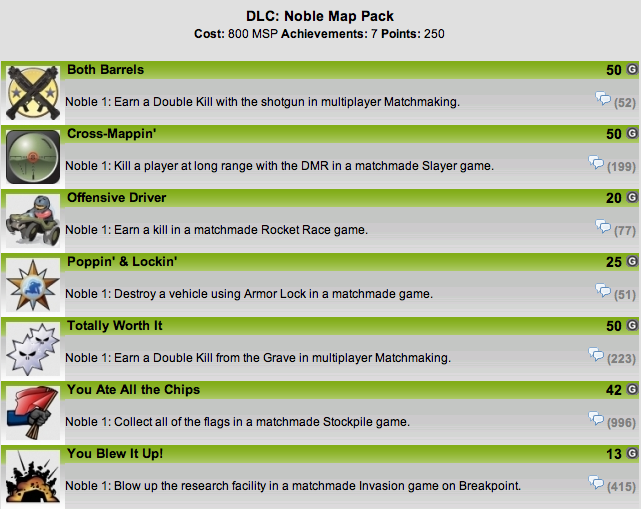
Noble Map Pack
Anchor 9
Breakpoint
Tempest
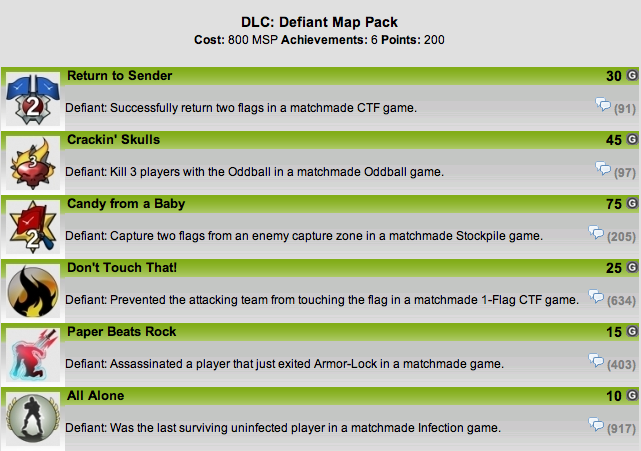
Defiant Map Pack
Condemned
Highlands
Unearthed (Firefight)
Firefight
Beachhead
Corvette
Courtyard
Glacier
Holdout
Outpost
Overlook
Waterfront
Unearthed
Installation 04
Matchmaking Details
[details=Matchmaking]Halo: Reach’s matchmaking allows players to compete with each other over the Xbox Live online service or System Link, for 16 players on the Xbox. The matchmaking system has been improved and redesigned from Halo 3; instead of having experience and rank as two separate features, Halo: Reach combines these two into a credit system where the player is scored on how well they play in each individual performance, instead of a win/loss system. As players gain credits, they achieve higher military rank, and are able to buy armor permutations to customize their SPARTAN and Elites character model. A new matchmaking system called the Arena is introduced for hardcore/competitive players where they will play in month-long seasons and be put into divisions of either Onyx, Gold, Silver, Bronze or Iron, depending on how well they play. Along with this, Campaign also has matchmaking support as well. Players are able to vote on which Campaign mission to play, similar to how voting works in competitive Matchmaking.
The multiplayer mode features standard multiplayer gametypes such as Slayer, Capture the Flag and King of the Hill, as well as reintroducing Race, a gametype that was once made exclusive only to Halo: Combat Evolved. Firefight mode, a cooperative gameplay mode that was made present in Halo 3: ODST, is featured in Halo: Reach with much more customizable features, from the skulls that turn on every round to the very enemies the player will face every wave, as well as having Matchmaking support. Halo: Reach also introduces new gametypes to multiplayer such as Invasion, Stockpile, and Headhunter.
The character models in Halo: Reach differs significantly than their previous architecture in Halo 3; both character models are now composed of different hitboxes and have different gameplay properties. The Elite character models are formidably larger, and physically superior, having faster shield regeneration and the ability to regain health fully over time than their SPARTAN counterpart. SPARTANs are smaller and weaker than their Elite counterpart and would only regain health to thirds over time unless they pick up a health pack. For these balancing issues, only specific gametypes in matchmaking allow SPARTANs and Elites to face each other in team-based games.[/details]
Classes
[details=Gamemodes]Rumble Pit - 8 player free for all
Team Arena - like regular team slayer but with arena adjustments
Team Slayer - 2 teams of 4 slayer and may include objective games
Team Objective - 2 teams of 4 only includes objective games
Double Team - 2 teams of 2 slayer and may include objective games
Invasion - 2 teams of 6 each member is assigned a partner/wingman to spawn off of and it’s mostly objective but has slayer games.
Team Snipers - 2 teams of 4 with each team having snipers
Team Swat - 2 teams of 4 NO shields slayer gametypes include DMR/Pistol or just a pistol
Multi Team - 4 teams of three mostly slayer but has objective gametypes
Big Team Battle - 2 teams of 8 mostly slayer but has objective gametypes
Living Dead - Infection gametypes
MLG - 2 teams of 4 with MLG gametypes
Griffball - 2 teams of 4 special assault gametype with swords and hammers
Community Slayer - Maps made by the community mostly slayer but has objective gametypes
Noble Map Pack - 2 teams of 8 with slayer and objective gametypes
Firefight Limited - 4 players in classic firefight
Firefight Arcade - 4 players 15 minutes, unlimited lives, crazy experience
Score Attack - Solo Firefight
Co-Op Campaign - 4 players choose campaign maps and the difficulty in matchmaking[/details]
Boosting
[details=Boosting]
Copy and Pasted from Se7enSIns, credit to supers0ak.
Links will be missing.
Techniques:
What you may do:
• Campaign Glitches (for Commendations) - ALLOWED
This includes Target Locator, Flawless Cowboy, LASO game saves (such as Showtime Jesse’s), and anything else you can think of. I’d recommend using the target locator first off on a new account.
• Time Zone Glitch - ALLOWED
After you’ve hit the credit limit (200,000 cR per day) but would still like to play and earn credits, then this is for you. Dashboard and change your time zone forward enough until the your xbox thinks the next day has begun (past 1:00am). You can then begin to earn credits for next day, once you’re finished playing, be sure to change the clock back to your normal time zone.
• Matchmaking Boost - ALLOWED/undetected
As long as every controller in the game gets 1 kill. If not, you will get banned.
• Semi-AFK Firefight - ALLOWED/undetected
You can still manually AFK firefight ban-free provided you earn 1,500 - 3,000 points per game (about 10-20 kills).
• Custom Challenge Boosting - ALLOWED/undetected
These techniques are fairly new, and it’s not certain what, if any ban hammer may be put up to protect against people from abusing this system. Currently, you may do as you please and reap tons of credits. Be wary though, that’s my word of caution. For more info on this rapidly evolving form of boosting.
Link: Custom Challenges Boosting Guide
What you may NOT do:
• Challenge Reset - NOT ALLOWED
You will get anywhere from a 2 week cR ban or a reset for this. The automated system they have for challenge resetting bans is a 2 week ban, however if something slips by it and goes undetected for a while, such as Showtime Jesse’s weekly LASO challenge resetting ordeal, they’ll throw together a ban wave and reset everyone involved at the time.
• AFK Firefight - NOT ALLOWED
aka using a turbo controller or starting up games of firefight and only getting a few kills. Anyone who’s ever AFK’d firefight before got a 2 week cR ban and a reset. Read THIS & THIS for more info.
• Brag on Bungie.net - NOT ALLOWED
Just poking a bit of fun at myself, lol. But yeah, don’t brag about boosting on the Bungie forums. 
How to Rank Up Quickly/Efficiently:
(Note: The cR limit is 200,000 per day)
For those who are interested, this is how you rank up the quickest in Halo: Reach.
• LOW Ranks
Recruit - Brigadier Grade 3 (0 - 1,760,000 cR) Approx.
Grifball Boosting:
Single Xbox Method:
- You can earn 5,000 - 7,000 cR (depending on your game completion credits) and 200-250 kills per game.
- Get four friends together, two controllers each. Get into a lobby together and search Grifball with all 8 controllers, one main account and one guest each. At the start of each game make sure each guest account gets a kill to avoid the banhammer. Then run to the opposite side of the map with your main account, and watch one side of the spawn zone, have your teammate watch the other. Spawn kill to your heart’s content. I’d recommend using the sword because you get 22 cR per kill as opposed to 17 cR per kill with the hammer.
Double Xbox Method: - You can earn 10,000 - 12,000 cR (depending on your game completion credits) and 400-450 kills per game.
- If you happen to own two xboxes, two gold accounts, four controllers, two copies of Reach, and can find someone else who does, then this method is for you.
- Have both xboxes switch their languages to some Japanese one, then get the two main accounts + their guests in a lobby together, and then the two ‘throw away’ accounts + their guests in a lobby together. Select the second option in matchmaking preferences (the language filter), then have both xboxes search Grifball at the same time. At the start of each game make sure all the guests accounts and both throw away accounts get at least one kill. After that, have you and your friend each pick a side at the opposing team’s spawn zone and kill to your heart’s content. I’d recommend using the sword because you get 22 cR per kill as opposed to 17 cR per kill with the hammer.
• HIGH Ranks
General - Inheritor (2,000,000 - 20,000,000 cR) Approx.
Play Firefight:
- Do not AFK, actually play. As you get to higher and higher ranks it starts to become worth your while to just play through the games because of the nice junks of credits you’ll earn from game completion. More-so worth it at the higher end of the spectrum.
Boost Matchmaking: - Feel free to continue to boost matchmaking to hit credit cap even sooner.
Commendations:
(Note: Achieving Onyx Max for a commendation does NOT increase your completion percentage, it only looks cool)
Campaign:
• I3utteRzZ made a great tutorial on how to boost every campaign commendation, use it.
Link: Campaign Commendation Guide
• If manually boosting isn’t for you, here’s an alternative guide on how to AFK nearly every commendation.
Link: Campaign Commendation Guide - AFK
(Note: You will be using tape/rubber bands to do this. Wired controller/Play-N-Charge Kit required. Demon and Flawless Cowboy Commendations not included)
Firefight:
Technically you can’t “boost” your firefight commendations. All of these have to come from hard work, and countless hours of playing every day. However, there are specific gametypes you can play repeatedly to do each one. Here’s some ideas on how to do every firefight commendation.
Link: Firefight Commendation Guide
I can’t vouch for all the ideas in that link, but personally I’ll be highlighting a few commendations that aren’t so obvious to your every day player, these are as follows:
• Riflin’ Through -
Search Score Attack and play 2X Score Attack, and just use the AR. Alternatively you can play Firefight Arcade and select FRGfight, then sign in a guest and perform the language trick so you don’t find any randoms. (LAGGING YOURSELF OUT OF GAMES IS BANNABLE)
• Vehicular -
Search Score Attack and pick a game variant and Beachhead. Then park the Rocket Hog in THIS location, and fire at the enemies. They’ll funnel down towards you from around the map. It may seem slow, but it is the best way. Alternatively, you can play a Score Attack variant on Holdout and use any of the human turrets, which also count towards Vehicular.
• Backup -
For this one it’s best search with a friend, who can help you finish off your kills. Perhaps each signing in a guest then search Firefight Arcade to guarantee it’s only the two of you in the game, or doing the language trick so that you don’t find a random. Then for example you could spam a few plasma pistol shots (single bullets, not overcharged) to weaken grunts and such, and when the mythic skull is turned on for the 2nd and 3rd waves a beatdown on a grunt/jackal/skirmisher will make them weak enough for an assist if your teammate cleans up the kill. Alternatively you could just search by yourself in Firefight Arcade and hope someone will clean up your kills… but yeah, good luck with that.
• Perfectionist -
The best way to do this is get a party of four together and search Firefight Arcade and wreck everything. If you and your friends play smart you can spawn kill the enemies without dying on EVERY map within 5-10min. Preferably you’d want to play either Rocketfight or FRGfight, these game variants make the games go by the fastest. If you only happen to have two friends with you, sign in a guest account and use that to play while hiding your main to guarantee the perfections. It’s always better than finding a random who will either a. suck, or b. be AFK. Alternatively, you can AFK firefight and hide a bunch… but that’s not practical.
• Grounded -
There are a few ways to go about doing this one.
- Firefight Doubles: Play firefight doubles with a guest account signed in, vote for Arcadefight on Beachhead. Use your guest account and get 3,000-5,000 points with it to avoid the AFK ban hammer (then you can hide him in that rock), then use your main account for the rest of the game to blow up all the vehicles. You will average 6 a game, 18 an hour (a VERY good rate).
- Firefight Limited: I have a few friends that have had success in Firefight Limited, voting for Beachhead or Unearthed, then working together with some buddies to clear the map who then let them kill the vehicle or two that spawns every round. The best way to kill a ghost is with a rocket after EMP’ing it with a plasma pistol to make it an easy target, shoot head on. The best way to kill a wraith is by jumping on it then planting a nade. You’ll have to play around with it and find what works best for you if you really have your heart set on getting onyx for this one. No one said getting 100% commendation was a walk in the park, that’s for sure.
- Firefight Arcade: Alternatively if you’re not so stressed about it you can just take out the few Banshees that show up once per wave on Holdout in Firefight Arcade. I’d recommend killing it with either a sniper or using one of the turrets on the map.
Matchmaking:
(Note: If desired, other playlists may be used to supplement this, but Invasion is without a doubt the best thing to do)
• Playlist: Invasion - Invasion can be used to boost every commendation, so why do anything else? What’s also nice about invasion is the fact that each controller has a ‘spawn buddy,’ now these spawn buddies have default spawns on the map which only change after you capture the territory for the next round. Aside from that, you can kill them as many times as you want and they’ll keep spawning in the same place over and over again.
• How to: 3-4 players, 3-4 controllers each (12 controllers total).
- First, make sure that one person in your party deletes all the map packs from their harddrive, this is to insure you get Invasion on Spire every time. This is the only map/game variant you want to play.
- If using 4 people (3 controllers each) you’ll need to do the following: (Note: If using 3 people, 4 controllers each, skip this step)
Have one person start a new lobby by them self (with no guests signed in), and one by one invite the other members to the game (no guests). Then taking turns in the order that you joined, each person will sign in their guests (starting with the party leader). Doing this insures that all the guests get paired up with other guests in game. You don’t want to have a main account and a guest paired together, otherwise each player won’t have their own group of guests to kill. - At the start of the game, make sure all the guests gets a kill before you start spawn killing. Each controller needs 1 kill per game, not every round. Now you’re all set to begin spawn killing for the rest of the game, enjoy. Also, be sure you capture the territory at the end of each round so that the game continues.
• You’re smart enough to find each of the different weapons on the map and such. I have faith that I don’t need to layout each individual commendation for you. Besides, that’d take too long.
The Banhammer:
• 24hrs - The first ban for incorrectly AFK’ing firefight or Matchmaking boosting.
Message displayed: “You have been temporarily banned from earning credits.”
• 1 week - The second ban for incorrectly AFK’ing firefight or Matchmaking boosting. (Note: This may also be your ban for the third, fourth, etc… bans as well).
Message displayed: “You have been temporarily banned from earning credits.”
• 2 week - The first ban for challenge resetting. You may also incur a 2 week ban after multiple infractions of AFK’ing firefight of boosting matchmaking incorrectly.
Message displayed: “You have been temporarily banned from earning credits for 2 weeks.”
• 1 month - This amazing status can only be achieved after multiple infractions, perhaps defying fate and challenge resetting twice? There’s no exact science as to how many offenses will earn you a 1 month ban.
Message displayed: “You have been temporarily banned from earning credits for 1 month.”
• Reset - Received for either challenge resetting or royally pissing off Bungie. This means that you lose your rank and have to start over at recruit. Yes you lose all armor purchased in the armory, no your commendations are not reset, only your rank. Resets are either be accompanied by a 2 week credit ban, or a 1 month credit ban.
There is no message displayed telling you that you’ve been reset, it just happens. If the credit ban associated with the reset is for 2 weeks, you will get the 2 week credit ban message. However, if your ban is for 1 month, it will simply give the generic message, “You have been temporarily banned from earning credits.”[/details]
Other
Trivia
[details=Trivia]Bungie has stated that Halo: Reach will be the last Halo game being released by them in the foreseeable future, as they are beginning a partnership with Activision, while 343 Industries has taken over the Halo franchise, already announcing a remake of Halo: CE and a brand new trilogy, called the “Reclaimer Trilogy” starting with Halo 4.
It was previously known as “Halo 4” by Microsoft Game Studios and 343 Industries marketing teams during the ONI Candidate Assessment Program V5.02A viral campaign.
Early on in the game’s development, before coming up with the idea of a prequel to Halo: Combat Evolved, Bungie considered making a follow-up to Halo 3, with John-117 as the protagonist.
Gunnery Sergeant Edward Buck, one of the main characters from Halo 3: ODST, appears in Halo: Reach as a Firefight voice in game and as a cameo in the level New Alexandria.
On the project page for Reach, located in the “Multimedia” section, the soundtracks to a couple of Reach trailers, “Lone Wolf” and “Uphill, Both Ways” by Martin O’Donnell, are available for download for free from Bungie.net.
Halo: Reach has 49 achievements (excluding DLC), which is a reference to Bungie’s love of the number seven (7 × 7 = 49).
All of the Campaign achievement titles, along with many of the others, are quotations from the Halo games and books.
The game’s release date, September 14, is the same day when Earth’s Orbital Defense Platforms were activated in 2552.
The game’s release date itself my be a reference to Bungie’s favorite number, 9 × 14 × 2010 = 253260 ÷ 36180 = 7.
The release date for the Noble Map Pack was set to be released 77 days after Halo: Reach’s release (November 30) which is another reference to Bungie’s love of the number 7.
Many of the Army troopers and Marines encountered in the game are named after Bungie employees and notable community members.
The AI of both the enemies and allies in the game is far more advanced than its predecessors. Evidence of this can be seen with how units will take cover often and not by accident, and friendly AI can pull off headshots whereas before they couldn’t.
Almost all Covenant technology, whether it be weapons, vehicles, or even Supply Cases, have a scale-like pattern on the purple metal that they are constructed of.
It is the second game to not feature Sentinels or the Flood, the first being Halo 3: ODST.
Halo: Reach has the most customizable Spartans of any of the Halo games.
Most of the weapons and vehicles in Halo: Reach have counterparts in the two factions in the game. The only exceptions are the Needler, which has no Human counterpart, and the Plasma Rifle and Spiker, which are the counterparts to the Human SMG, which is absent in Halo: Reach.
The H-165 FOM Target Locator can be used in all gameplay modes except multiplayer.
The forklift and semi truck are drivable vehicles in Campaign, but neither are playable, or selectable vehicles in Forge.
As stated by 343 Industries, a title update was introduced in September 2011, changing several armor ability effects, modifying the melee system, and making reticule bloom optional.
Halo: Reach is the only game so far that includes all fightable Covenant species, as Engineers are absent from the main trilogy, Elites are not in Halo 3: ODST and Drones are not in Halo Wars. The Prophets, however, do not appear at any point.
It is possible to play with 4 player split-screen on one console via a glitch.
After the final mission Lone Wolf, Dr. Halsey will explain about Noble Six giving Humanity time to prepare stop the Covenant, the date is July 7, 2589. This is a refrence to Bungie’s love of 7 and Bungie Day. Also being 32 years after Halo 4.[/details]
Easter Eggs
Easter Eggs
For the large number of Easter Eggs click here: Halo Reach Easter Eggs | Halo Easter Eggs
![]()
Took me a long time to make this thread and yes I realise it has been out a long time but some people may learn something new.
Be sure to check out the Halo Wiki, the Lore in the series is fantastic.
Thanks for reading this! Look out for more Ultimate Threads coming soon!
Want 100k credits for free? Check here: https://www.wemod.com/forum/63-halo-series/117354-100-000-credits-reach-no-mods-hacks-boosting.html
Information gathered from Halo Wiki and various other sources including my own knowledge.


 helpful


 levitra nebenwirkungen drug effects levitra more side